Working with My Locations
The Function provides you with a listing of the locations/buildings that are currently in your customer instance. From a location perspective, everything that you can visualize on the map is managed and loaded from .
When you click the  sign to the left of a building, the core building record displays where you can view the basic building information, as well as Building Manager information, Building Intelligence (tenant data), and Network Intelligence (carrier data).
Note
Some of the data options described above may not be available in your viewing area. Your view of data is dependent on the modules purchased as well as your defined user access privileges.
When you click the on the navigation bar, the My Locations page displays as shown in the sample screen below.
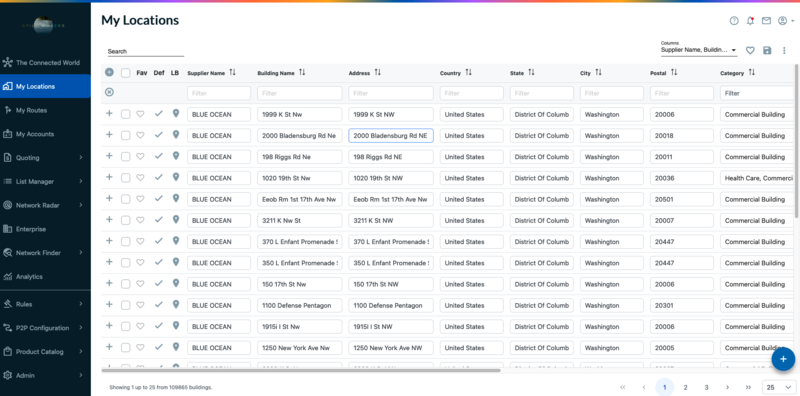 |
From the page, you can perform these tasks using the icons that display to the left of any address/location.
Icon | Description |
|---|---|
| View building information, pricing, network service interface pricing, building manager, building intelligence, network intelligence, and/or any attachments that have been added for an address/location. |
| Perform an action on selected locations, such as export selected or export all. See Acting on an location(s).
|
| Click the icon to save the building to your Favorites. Favorites are located in the My Locations page by selecting the icon in the upper right corner to display only your saved Favorite building locations. Favorite building locations are also identified in the third column of the My Locations page, indicated as Orange in color. |
| Save an address as a default. |
| View and zoom into a location on the map. |
 |
To search for a specific location:
In the field located in the top right side of the page, type the address to be located within the building list,A drp-down list of the possible matches appears under the search bar. Select the desired address. Following dialog box appears containing the selected location.
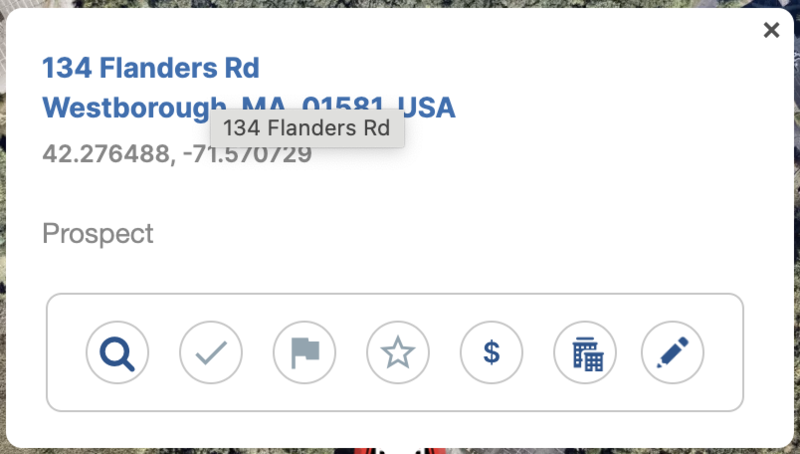 |
Click the address to view the location record with an option to add the location in the location data. Following is an example of the location record.
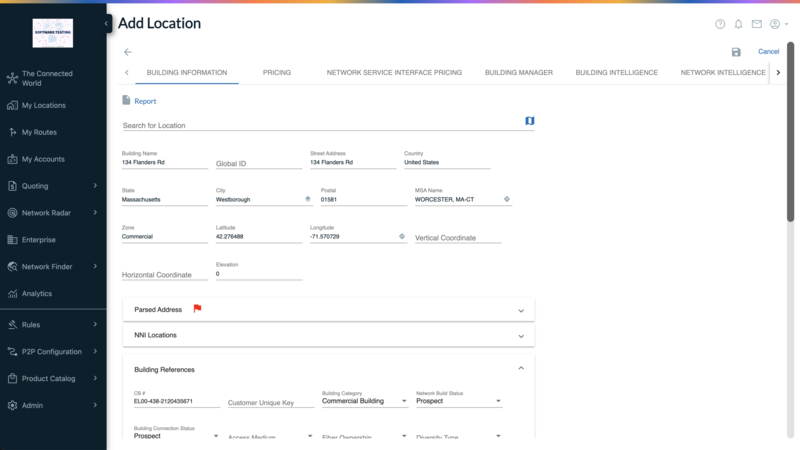 |
Click the Back Button  to navigate back to the search result dialog box.
To view building level details:
Click the to the left of any location to obtain location level details.
Result: The Building Information page displays as the default screen.
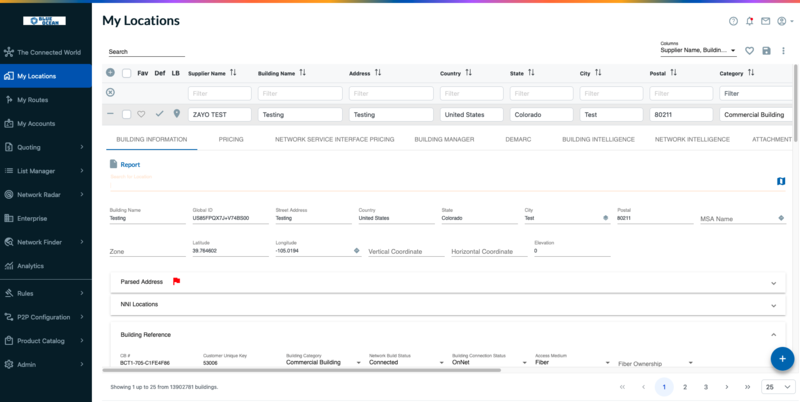 |
The Building Information page displays building level details, building reference data, custom fields, and building notes. If you have Edit User privileges or above, you can add or edit the building information on this page.
From this page, you can also choose from the following functional tabs. Each of these functions are described in the sections that follow.
Note
Some function tabs may not be visible to you. Viewable functions are dependent upon your subscription services and user access privileges.
To view pricing information, where applicable:
Click the tab.
Result: The Pricing Selection Criteria page displays.
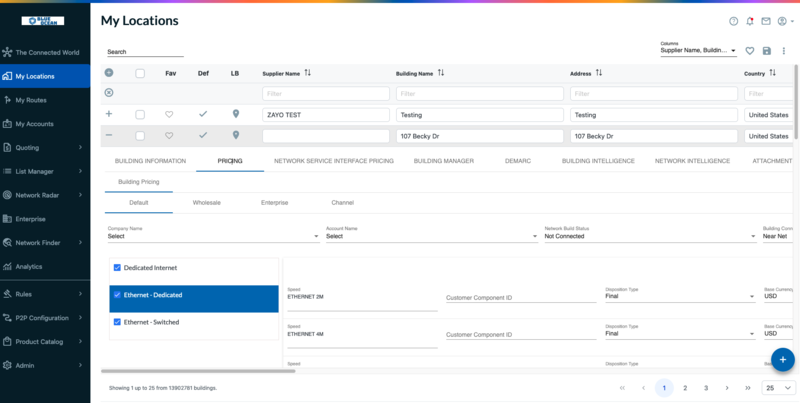
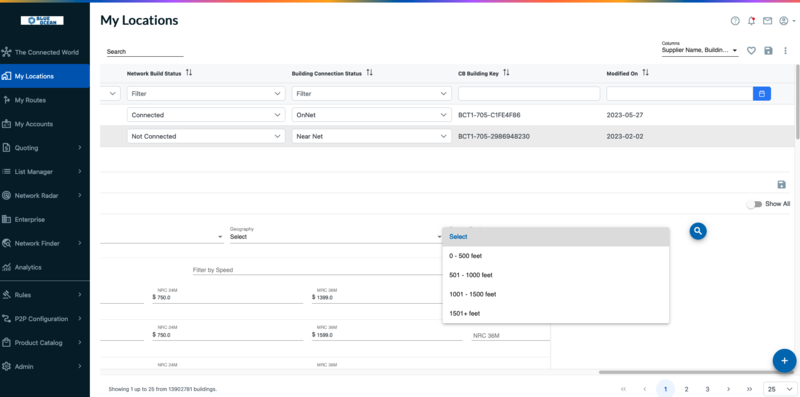
Select the criteria for which you want to obtain pricing, i.e., Network Build Status, Building Connection Status, Media Type, etc.
Scroll to the right of the page within pricing tab and Click the
 icon located to the right of the selection criteria fields.
Result: The Pricing page displays pricing that matches your selected criteria.
The Building Manager tab enables you to view and/or add detailed building manager information to a building record.
Building Manager information includes such data as Property Details, Property Manager, Building Access Manager, Easement Manager, Lateral Manager, Riser Manager and Demarc Manager information.
Note
You can add building manager information at the time that you add a new building record, or you can add it later.You can add building manager information at the time that you add a new building record, or you can add it later.
To add building manager information to a building record:
Click the tab.
Enter any detailed property details and/or manager information that you wish to store with the building record.
Click the
 Save icon located in the upper right corner of the page.
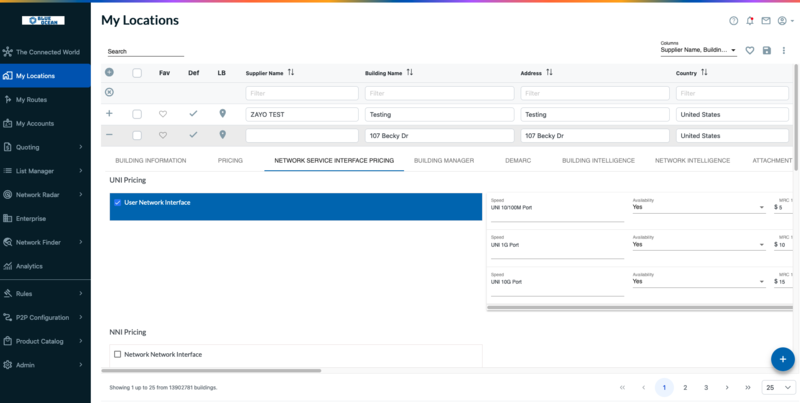
To view network service interface pricing:
Click the tab.
Result: The Network Service Interface Pricing page displays where you can view UNI and NNI pricing, where applicable.
 |
To view network intelligence information:
Click the tab to view Telco, CableCo, and Broadband information for this location.
Result: The Network Intelligence page displays.
Note
To improve visibility and preference of Network Provider results, the Supplier Name/Carrier column has been reordered to display OnNet, Coax/HFC before Near Net, Fiber providers. You can also filter the list based on your preferred response.To improve visibility and preference of Network Provider results, the Supplier Name/Carrier column has been reordered to display OnNet, Coax/HFC before Near Net, Fiber providers. You can also filter the list based on your preferred response.
For more information about Network Intelligence data, see "Analyzing Network Intelligence Data".
Demarc locations identify the physical point of connectivity to the network within a building, campus, mall, or tall building, for example.
To add a single demarc location
Demarc locations identify the physical point of connectivity to the network within a building, campus, mall, or tall building, for example.
Within page, expand the location where you want to add demarc by clicking before the location name.
Click the tab within the location record.
Scroll to the right of the page and click the on the upper right corner within tab.
On the pop-up dialog box, complete the required fields, as noted below. All remaining fields are optional.
Field Name
Description
Location Name (required)
Street address
GLID (optional)
Global Location Id (For more information, see the topic "About Global Id"
Demarc Location (required)
The address or physical location, such as a Lat/Long
Demarc GLID (optional)
Currently, this value is the same as the GLID above; however, in a future release, this field will expand to allow for scenarios where the Demarc location is different than the building location, for example on a specific floor level.
Demarc Name (optional)
Optionally, enter a name to identify the demarc location, such as Roof Top, 7th Fl Closet, etc.
GLID Demarc ID (optional)
Any unique identifier that the customer maintains to further define/track the Demarc location, such as 102, 823, etc.
Demarc Status (required)
Options include:
Connected
In Progress
Not Connected
Planned
Demarc Build Status (required)
Options include:
Near Net
OffNet
On Net-Limited Access
OnNet
Demarc Ownership (optional)
Options include:
Built
Leased
Access Medium (required)
Options include:
Coax/HFC
Copper
Fiber
Other
Wireless-Fixed
Wireless-Mobile
Interval (required)
The timeframe, in days, for installation that is quoted by the provider to the customer. For example, 30.
MRC (optional)
Monthly Recurring Cost
NRC (optional)
Non-recurring Cost
Rules (optional)
Optional note, such as "Add to rate"
Products Available (optional)
List of available products, comma delimited.
vNid Link (optional)
Virtual Network Interface Device link for e-access services, as defined by the (MEF) Metro Ethernet Forum.
Within the Demarc section of the page, click Save located next to the + sign.
Note
Be sure to click the correct Save button within the Demarc section of the page, by scrolling to the right of the main page. If you click the Save button at the top of the My Locations page, your Demarc updates will not be saved.
To import multiple demarc locations:
Within page, expand the location where you want to add demarc by clicking + sign before the location name.
Click the tab
Within the Demarc pop up section, click the menu (vertical ellipsis located on far right of demarc tab (Scroll right to access actions menu).
Click . The Import dialog box displays.
Optionally, click to ensure that all required fields and formats are included in your spreadsheet for upload.
Note
In addition to the required fields identified in the table above, the import file also requires the to be included in the Excel spreadsheet for import.
Click the button located at the top, left side, of the dialog box.
From your local drive, locate and select the Excel file for import.
Click the button located at the bottom, right side, of the dialog box.
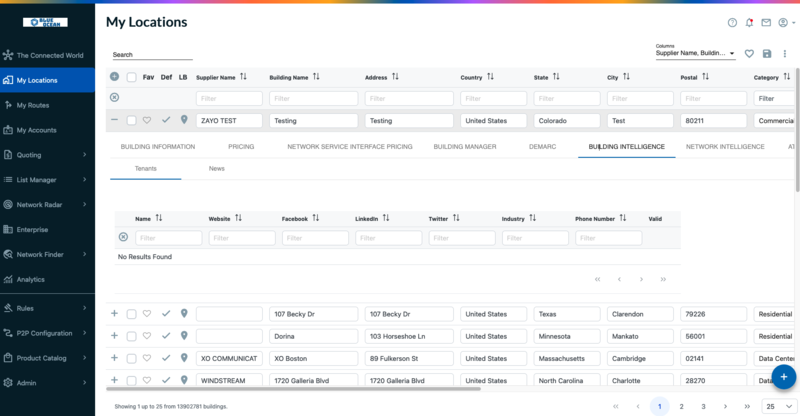
To view building intelligence information:
Click the tab to view a list of the tenants in the building and/or related news articles about this location.
Result: The Building Intelligence page displays.
 |
To view/add attachments to the building record:
Click the tab to view any attachments that have been added to this building record or to add an attachment.
Result: The Attachments page displays. If files are attached to this building list, they appear here for viewing.
To add an attachment, click the button and select the file from your local drive.
Result: The file is attached to the building list for viewing.


