Viewing and Working with Intersections
Viewing network intersections
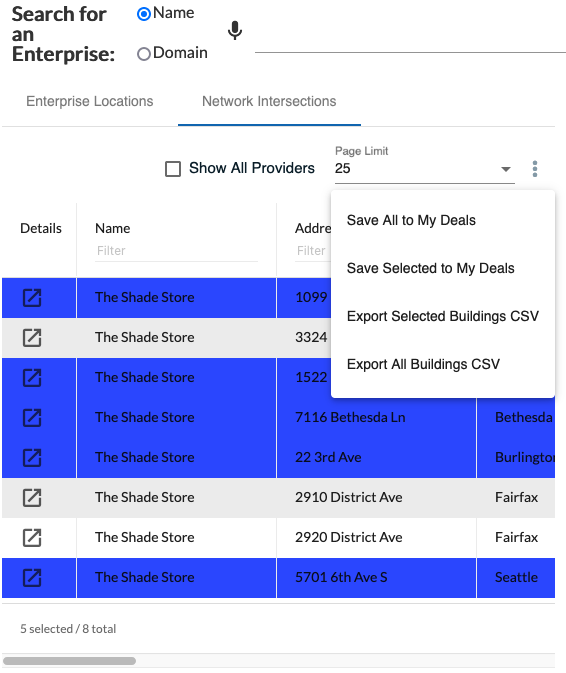
After searching on an enterprise location, the Network Intersections tab on the default Locations page enables you to view a listing of those locations that intersect with your current building footprint.
To view network intersections:
From the Locations page, click the tab.
Result: The Network Intersections page displays a list of all locations that intersect with your building footprint, as shown in the example below.

You can also view these locations on the network map:
The orange pins indicate where the intersecting locations reside.
The Network Intersections location list provides information such as Name, address, network connection status, building connection status, media type, provider, and unique key (customer identifier) for each intersecting location:
Note
Scroll vertically and/or horizontally to view all records on the page and view all columns as mentioned above.
From the Network Intersections page, you can view:
 |
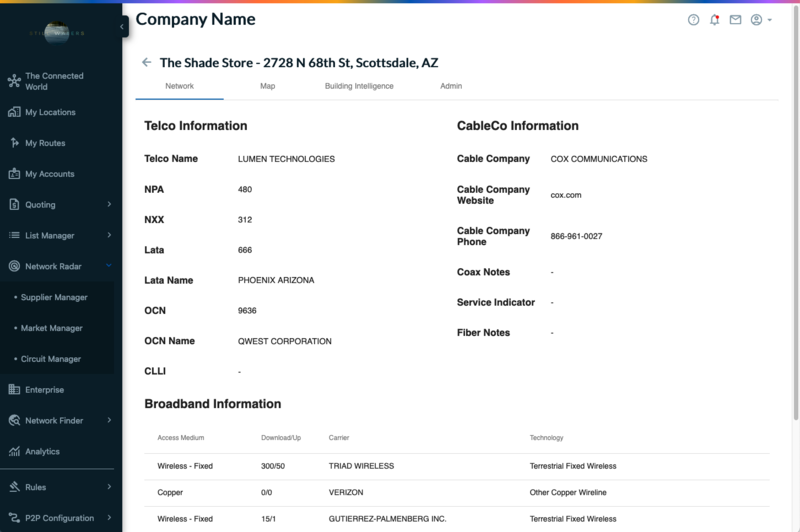
Like the Details page provided for Enterprise locations, click the Details icon  for any intersecting location to obtain additional information for the selected location as displayed for one location in the following example:
 |
You can run a quote on the search locations from Enterprise Profiler. Follow the process below to select the locations from Enterprise Profiler and run a quote on the selected or all locations.
Before you select locations and run a quote from Enterprise Profiler, you need to have a matching account in under menu. If you do not have a matching account, follow the procedure below to create a new account that matches the Enterprise.
Click from the navigation sidebar.
Click .
Click the button.
Result: Dialog box displays as shown in below example.
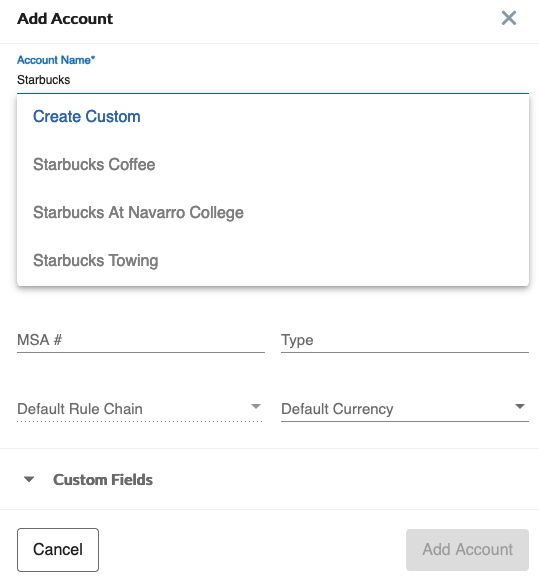
Start typing the name of the enterprise. If an existing account exists, it will display in the auto populated list. Select the enterprise name from the suggestions. If an existing account does not match your desired name, type the complete name you want to create and click on "Custom Create".
The button is enabled. Click the button and a new account is created.
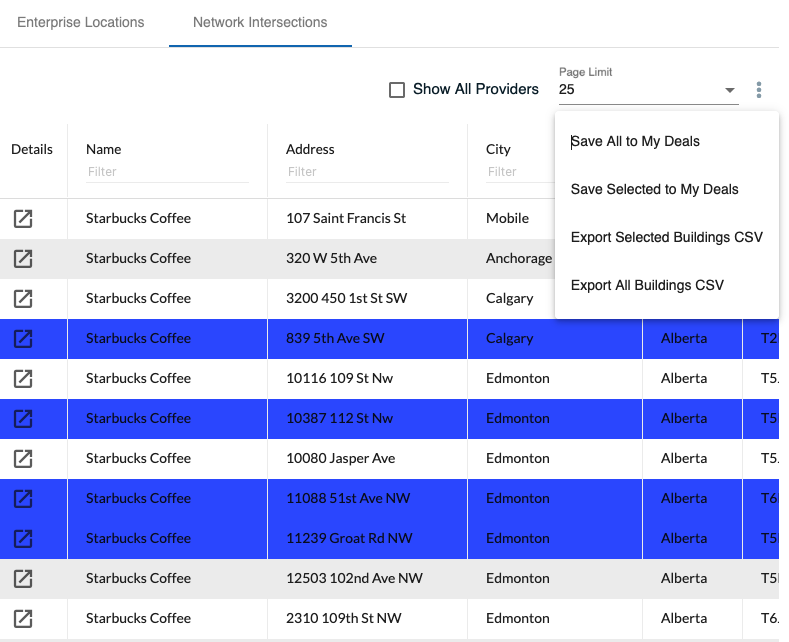
From Enterprise Profiler search results page, select locations from the appropriate tab Enterprise Locations or Network Intersections with and click on the ellipsis
 on the right corner of the page, under the tab, as shown below:
Result: Actions menu appears as shown in below example.
Click from the above menu.
Result: A new dialog box appears as below:

From the drop-down menu select the desired Account. Once you select the Account, you can either from the drop-down menu or create a new deal by entering the desired name in the field.
If you click the button, it saves the deal and you can run a quote on the selected locations by navigating to and selecting the deal you saved in the previous step.
If you click the button, the system redirects you the page, where you can configure and run a quote on selected locations.
Note
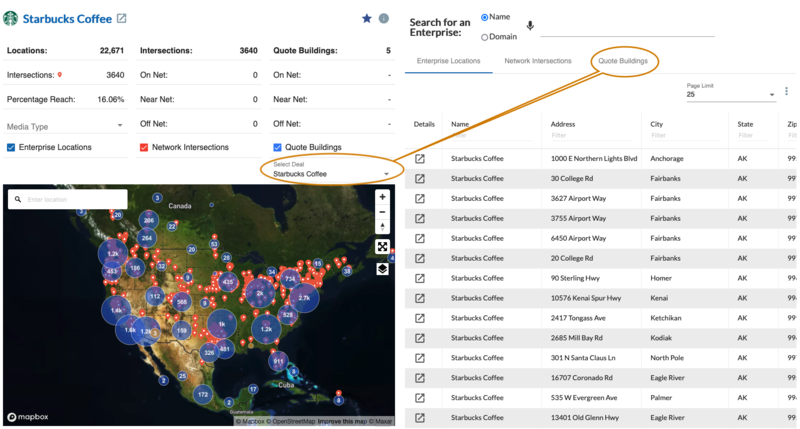
The tab is visible only if you select a deal as shown in the below example. If no deal is selected the tab highlighted in the below example is not visible.
To export selected building to a CSV file:
Hold down the to select multiple building locations. Selected locations appear highlighted in blue.
To the right of the Page Limit field shown at the top right side of the page, click the
 (vertical ellipsis) icon.
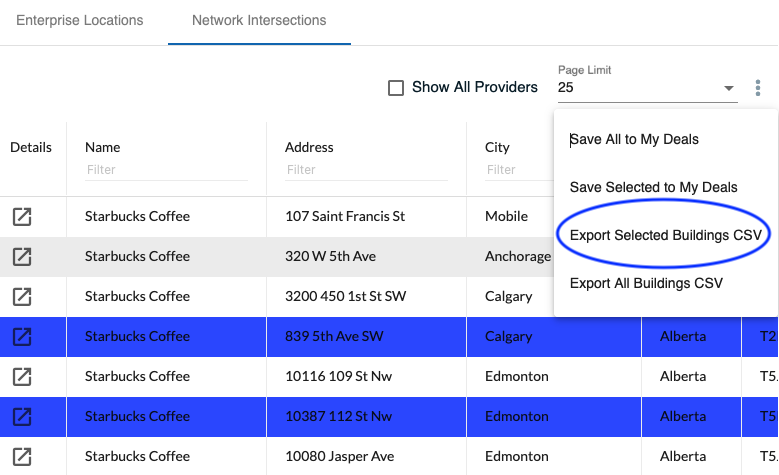
Click . A message displays “Download will begin in a few seconds”.
Result: The CSV file downloads to your system.
To export all building to a CSV file:
From the top right side of the page, next to Page Limit field , click
 (vertical ellipsis) icon.
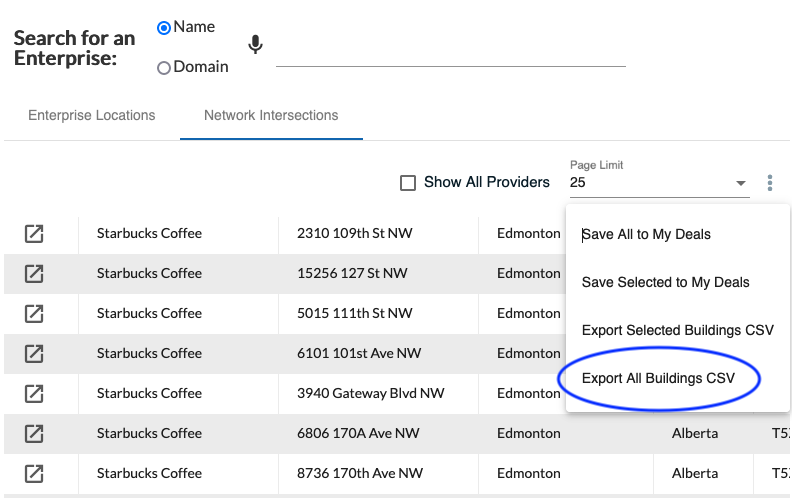
Click .
Result: A message displays “Download will begin in a few seconds”.