Company Details
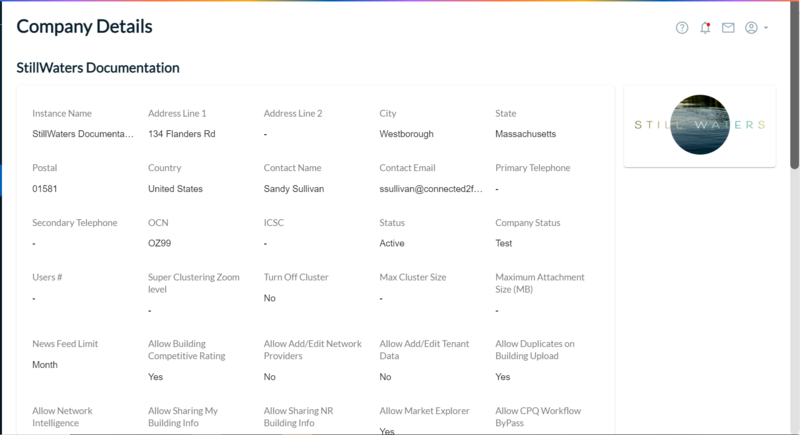
The Company Details page enables you to view the instance configuration details, including the company address and contact information as well as the TCW services that are enabled/disabled for this instance.
Where applicable, and based on your instance level entitlements, you can also set up CPQ rounding values, CPQ external integration triggers, and/or CPQ ordering external integration triggers from this tab. Unless enabled for your instance, these additional functions are not displayed.
The following figure provides an example of the Company Details page. Company details can be viewed, but not edited from this page. All Company Details are added/edited by a designated Connectbase Administrator in Super Admin. If you need to make changes to any of the data on this page, please contact your Customer Success Manager for assistance.
 |
If you require technical assistance or wish to report an issue to the Connectbase Support team, please log into the Connectbase Customer Support Desk Portal at https://support.connectbase.com and submit a support ticket.
To avoid randomness in the calculations of numbers and pricing in CPQ responses, you can use the CPQ Rounding Rules to set your preferred rounding criteria.
For example, if you set rounding to “On” and the value is that of 5, 6, 7, 8, or 9, the value will round up to the value indicated in the Significant Digit field. You set the Significant Digit field to indicate if you want the rounding to be implemented on, for example, 10s, hundreds, dollars, etc.
To set CPQ rounding rules:
Click .
Scroll down to the CPQ Rounding Value section of the page.
In the CPQ Rounding Value field, click the down arrow to select the option to be applied. Options include:
Off - No Rounding
On - Apply standard rounding as follows:
If the value is 0,1,2,3, or 4, round down
If the value is 5, 6, 7, 8, or 9, round up
Up - Always round up, regardless of current value.
Down - Always round down, regardless of current value.
In the Significant Digit field, type the rounding rules to be applied in the CPQ process flow. The rounding value is applied after cost and margin are received. The following conditions apply:
Setting the number of digits: x.xx
This string is the setting for which the system will round to. For example, x.xx will round to the whole dollar
Setting a number to round to: #.xx
Optional setting will be a number in the string to indicate what the system will round to. For example, 9.xx would round the number that always has a 9 in the ones.
These settings are to be applied to CPQ in step 3, after price and margin are received to create a properly rounded number for the customer.
CPQ External Integration is an instance level entitlement. When enabled, this function displays in the Company Details tab on the Admin panel. Admin level users can configure the system to trigger a JSON response for a callback or fallout notification to be sent to a given endpoint and associate that to a specific CPQ workflow step (for example, Priced, Quoted, Sent, etc.). If CPQ External Integration is configured, when a user runs through a CPQ quote and they progress the quote through the workflow, the system will initiate a "callback" api call and send a JSON response to the configured URL. The JSON response includes the account, deal, quote identifier, and locations. The CallBack (Fallout) response provides only those locations that did not generate a solution (i.e., "No Solution Found" and "No Solution Found - Final").
To configure a CPQ external integration trigger:
From the Admin > Company Details panel, scroll down the page to the CPQ External Integration section.
In the Authentication Configurations section, click the (Add new configuration) icon.
Result: A new authentication line is added.
In the Auth Type field, select the type ( or ).
In the Credential Name field, enter a title/name to identify the callback.
In the Login URL field, enter the URL endpoint for receipt of the callback JSON response.
The Client Id field contains the user’s email address.
The Client Secret contains the user’s password credentials.
Client Scope is an optional field that you can use to further define the client.
Click to add one or more integration callback notifications.
The triggers enable you to define the specificity of the callback. For example, CPQ Solution trigger would occur if the location were Priced, Quoted, or Solution state from CPQ. The CPQ No Solution would trigger if the location were returned as No Solution or No Solution Found Final.
Triggers include:
CPQ solution triggers: priced, quoted, CPQ rules
CPQ no solution triggers: No solution, No solution final
CPQ workflow triggers: Quote sent, Deal created, Quote created, Configure completed, Solutions created, and Quote finalized
After you select the trigger, click the + sign to the right of the trigger.
Result: The following additional fields display, as shown in the example below:
Auth Header
Customer Transaction Type – A custom field into which you can enter any data (string) that you want to be transferred with the callback.
Endpoint – The URL to which the callback will be sent.
Select Configuration – Select from the Authentication Configurations field, such as OAuth, for example.
To add additional triggers, click the (Add New Integration Callback) icon.
Result: A new configuration line is added for input.
When you finish configuring your triggers, click the (disk) icon, located to the right of the CPQ External Integration heading.
The next step requires you to set up your ordering configurations in the Admin panel for your instance.
Following is the description of each workflow trigger and an example of the returned payload respectively.
Deal created
This event is triggered when a Deal is created.
{
    "status": "success",
    "customerTransactionType": "",
    "workflowEvent": "Deal created",
    "data": {
        "accountName": "Temporary account for generating quick quote pricing",
        "dealId": 1067862,
        "dealName": "Temporary deal for generating quick quote pricing",
        "createdDate": "2024-10-04T12:42:15.000Z",
        "createdBy": "Martin Calder",
        "userFirstName": "Martin",
        "userLastName": "Calder",
        "nativeUserId": "15402"
    }
}
Quote Created
This event is triggered in Step 2 of the quoting process - "Configuration".
{
    "status": "success",
    "customerTransactionType": "",
    "workflowEvent": "Quote created",
    "data": {
        "accountName": "Temporary account for generating quick quote pricing",
        "dealId": 1067862,
        "dealName": "Temporary deal for generating quick quote pricing",
        "quoteId": 1605404,
        "quoteName": "134 Flanders Rd Westborough MA 01581 USA",
        "createdDate": "2024-10-04T12:42:17.000Z",
        "createdBy": "Martin Calder",
        "userFirstName": "Martin",
        "userLastName": "Calder",
        "nativeUserId": "15402"
    }
}
Configure Completed
This event is triggered in Step 2 of the quoting process - "Configuration".
{
    "status": "success",
    "customerTransactionType": "",
    "workflowEvent": "Configure completed",
    "data": {
        "accountName": "Temporary account for generating quick quote pricing",
        "dealId": 1067862,
        "dealName": "Temporary deal for generating quick quote pricing",
        "quoteId": 1605404,
        "quoteName": "134 Flanders Rd Westborough MA 01581 USA",
        "createdDate": "2024-10-04T12:42:17.000Z",
        "createdBy": "Martin Calder",
        "configIds": [
            1446300,
            1446307
        ],
        "userFirstName": "Martin",
        "userLastName": "Calder",
        "nativeUserId": "15402"
    }
}
CPQ Rules
This event occurs after all quotes are received, but BEFORE the Priced event as the Rules may affect the content of the Priced payload.
{
    "status": "success",
    "pagination": {
        "page": 1,
        "pageSize": 100,
        "totalPages": 1
    },
    "data": {
        "totalLocations": 1,
        "totalLocationSolutions": 1,
        "numSolutions": 1,
        "pricingStatus": {
            "quoteId": 1620665,
            "quoteName": "Test External Integration",
            "customerQuoteId": "648384",
            "accountId": 899777,
            "accountName": "Lordcalder Tests Limited",
            "dealId": 1068252,
            "dealName": "External Integrations",
            "defaultCompanyCPQRuleChain": "icb",
            "prices": [
                {
                    "id": 219834092,
                    "quoteId": 1620665,
                    "priceState": "Selected",
                    "term": "MTM",
                    "locationId": 25415404,
                    "customerLocationId": "",
                    "note": "Month to Month for Dedicated Internet/ETHERNET 100M; ",
                    "provider": "BLUE OCEAN",
                    "mrc": 0,
                    "mrcCost": 0,
                    "mrcTotalPrice": 0,
                    "nrc": 0,
                    "nrcCost": 0,
                    "nrcTotalPrice": 0,
                    "baseCurrencyId": 1,
                    "address": "134 Flanders Rd",
                    "city": "Westborough",
                    "state": "MA",
                    "zip": "01581",
                    "addressValid": 1,
                    "secondaryDesignator": "",
                    "secondaryNumber": "",
                    "latitude": "42.276488",
                    "longitude": "-71.570729",
                    "uniqueKey": "BCT1-705-1762109187",
                    "globalLocationId": "US87JC7CGH+HPRBS00",
                    "countryCode": "USA",
                    "preferredSupplier": 0,
                    "product": "Dedicated Internet",
                    "speed": "ETHERNET 100M",
                    "uploadSpeed": 100,
                    "downloadSpeed": 100,
                    "mediaType": "Fiber",
                    "netStatus": "Not Connected",
                    "bldgStatus": "Near Net",
                    "status": "Originated from Sub-quote",
                    "dispositionCode": "Final",
                    "buildingCompetitiveRating": "Yellow",
                    "pricingType": "END USER",
                    "createdDate": "2024-10-09T08:45:43.000Z",
                    "createdBy": "Martin Calder",
                    "lastmileSupplier": "BLUE OCEAN",
                    "catalog": "Default",
                    "resellerSupplier": "BLUE OCEAN",
                    "resellerProviderMrc": 0,
                    "resellerProviderNrc": 0,
                    "totalOrderValue": 0,
                    "baseCurrency": "USD",
                    "quoteCurrency": "USD"
                }
            ],
            "userFirstName": "Martin",
            "userLastName": "Calder",
            "nativeUserId": "15402"
        }
    },
    "customerTransactionType": ""
}
Priced
This event is triggered in Step 3 of the quoting process - "Pricing And System Reference Data".
{
    "status": "success",
    "pagination": {
        "page": 1,
        "pageSize": 100,
        "totalPages": 1
    },
    "data": {
        "totalLocations": 1,
        "totalLocationSolutions": 1,
        "numSolutions": 16,
        "pricingStatus": {
            "quoteId": 1605404,
            "quoteName": "134 Flanders Rd Westborough MA 01581 USA",
            "customerQuoteId": "638234",
            "accountId": 765334,
            "accountName": "Temporary account for generating quick quote pricing",
            "dealId": 1067862,
            "dealName": "Temporary deal for generating quick quote pricing",
            "defaultCompanyCPQRuleChain": "icb",
            "prices": [
                {
                    "id": 218536191,
                    "quoteId": 1605404,
                    "priceState": "Selected",
                    "term": "12",
                    "locationId": 25415404,
                    "customerLocationId": "",
                    "note": "Pricing geography - Broadband On-Net;",
                    "provider": "SUPPLIERNAME",
                    "mrc": 1930.00,
                    "mrcCost": 1630.00,
                    "mrcTotalPrice": 1930.00,
                    "nrc": 1700.00,
                    "nrcCost": 1500,
                    "nrcTotalPrice": 1700.00,
                    "baseCurrencyId": 1,
                    "address": "134 Flanders Rd",
                    "city": "Westborough",
                    "state": "MA",
                    "zip": "01581",
                    "addressValid": 1,
                    "secondaryDesignator": "",
                    "secondaryNumber": "",
                    "latitude": "42.276488",
                    "longitude": "-71.570729",
                    "uniqueKey": "BCT1-705-1762109187",
                    "globalLocationId": "US87JC7CGH+HPRBS00",
                    "countryCode": "USA",
                    "preferredSupplier": 0,
                    "customerComponentId": "",
                    "product": "Broadband",
                    "speed": "100/20",
                    "uploadSpeed": 20,
                    "downloadSpeed": 100,
                    "mediaType": "Wireless - Fixed",
                    "status": "Originated from Sub-quote",
                    "dispositionCode": "Final",
                    "buildingCategories": "Commercial Building",
                    "pricingType": "END USER",
                    "createdDate": "2024-10-04T12:43:39.000Z",
                    "createdBy": "Martin Calder",
                    "lastmileSupplier": "Blue Ocean",
                    "catalog": "Default",
                    "resellerSupplier": "Blue Ocean",
                    "resellerProviderMrc": 600,
                    "resellerProviderNrc": 1600,
                    "totalOrderValue": 8800,
                    "baseCurrency": "USD",
                    "quoteCurrency": "USD"
                },
                {
                    "id": 218536255,
                    "quoteId": 1605404,
                    "priceState": "Priced",
                    "term": "MTM",
                    "note": "",
                    "nniLocation": "",
                    "provider": "Blue Ocean",
                    "mrc": 0,
                    "mrcCost": 0,
                    "mrcTotalPrice": 0,
                    "nrc": 0,
                    "nrcCost": 0,
                    "nrcTotalPrice": 0,
                    "baseCurrencyId": 1,
                    "latitude": "",
                    "longitude": "",
                    "uniqueKey": "",
                    "globalLocationId": "",
                    "preferredSupplier": 0,
                    "product": "Dedicated Internet",
                    "speed": "ETHERNET 100M",
                    "uploadSpeed": 100,
                    "downloadSpeed": 100,
                    "mediaType": "Fiber",
                    "netStatus": "Connected",
                    "bldgStatus": "OnNet",
                    "status": "Pricing generated from Blue Ocean-705 API",
                    "dispositionCode": "Final",
                    "createdDate": "2024-10-04T12:48:13.000Z",
                    "createdBy": "Martin Calder",
                    "catalog": "Default",
                    "totalOrderValue": 0,
                    "baseCurrency": "USD",
                    "quoteCurrency": "USD"
                }
            ],
            "externalApiProgress": 100,
            "transactionStatus": "Completed with Errors",
            "message": "Solutions Found",
            "userFirstName": "Martin",
            "userLastName": "Calder",
            "nativeUserId": "15402"
        }
    },
    "customerTransactionType": ""
}
Solutions Created
This event is triggered in Step 3 of the quoting process - "Pricing And System Reference Data". This is a summary of the configuration details.
{
    "status": "success",
    "customerTransactionType": "",
    "workflowEvent": "Solutions created",
    "data": {
        "accountName": "Temporary account for generating quick quote pricing",
        "dealId": 1067862,
        "dealName": "Temporary deal for generating quick quote pricing",
        "quoteId": 1605404,
        "quoteName": "134 Flanders Rd Westborough MA 01581 USA",
        "createdDate": "2024-10-04T12:42:17.000Z",
        "createdBy": "Martin Calder",
        "configIds": [
            1446300,
            1446307
        ],
        "userFirstName": "Martin",
        "userLastName": "Calder",
        "nativeUserId": "15402"
    }
}
Quote Finalized
This event is triggered in Step 4 of the quoting process - "Generate Quote". When a user clicks the "Generate Quote" button, the below payload is sent to the callback endpoint.
Quote Finalized Trigger Payload Example
{
	"status": "success",
	"customerTransactionType": "",
	"workflowEvent": "Quote finalized",
	"data": {
		"accountId": 899777,
		"accountName": "Callback Tests Company",
		"dealId": 989757,
		"dealName": "Test Deal Created Event 1",
		"quoteId": 1493380,
		"quoteName": "Test callback quote completed",
		"createdDate": "2024-08-25T16:19:58.000Z",
		"createdBy": "Martin Calder",
		"configIds": [
			1342152
		],
		"userFirstName": "Martin",
		"userLastName": "Calder",
		"nativeUserId": "15402"
	}
}
Quoted
This event is triggered in Step 4 of the quoting process - "Generate Quote". After the "Quote Finalized" event, the below payload is sent to the callback endpoint.
{
    "status": "success",
    "pagination": {
        "page": 1,
        "pageSize": 100,
        "totalPages":
    },
    "data": {
        "totalLocations": 1,
        "totalLocationSolutions": 1,
        "numSolutions": 2,
        "pricingStatus": {
            "quoteId": 1606378,
            "quoteName": "Test12",
            "customerQuoteId": "358505",
            "accountId": 1068115,
            "accountName": "Steph Test",
            "dealId": 1068229,
            "dealName": "test1",
            "defaultCompanyCPQRuleChain": "icb",
            "prices": [
                {
                    "id": 218561975,
                    "quoteId": 1606378,
                    "priceState": "Quoted",
                    "term": "36",
                    "locationId": 25417243,
                    "customerLocationId": "",
                    "note": "Install Interval = 30 days; ",
                    "provider": "BLUE OCEAN",
                    "mrc": 35.29,
                    "mrcCost": 30,
                    "mrcTotalPrice": 35.29,
                    "nrc": 117.65,
                    "nrcCost": 100,
                    "nrcTotalPrice": 117.65,
                    "baseCurrencyId": 1,
                    "address": "Av Miguel Aleman 5054 Linda Vista",
                    "city": "Guadalupe",
                    "state": "NLE",
                    "zip": "67130",
                    "addressValid": 1,
                    "secondaryDesignator": "",
                    "secondaryNumber": "",
                    "latitude": "25.691241",
                    "longitude": "-100.246777",
                    "uniqueKey": "BCT1-705-1729256518",
                    "globalLocationId": "",
                    "countryCode": "MEX",
                    "preferredSupplier": 0,
                    "customerComponentId": "",
                    "product": "Ethernet - Switched",
                    "apiProductName": "Ethernet Services",
                    "speed": "ETHERNET 10M",
                    "uploadSpeed": 10,
                    "downloadSpeed": 10,
                    "mediaType": "Fiber",
                    "netStatus": "Connected",
                    "bldgStatus": "OnNet",
                    "interval": 30,
                    "status": "Company - 36 month Catalog Pricing configured for address - no geography ",
                    "dispositionCode": "Final",
                    "buildingCategories": "Data Center",
                    "installInterval": 30,
                    "buildingCompetitiveRating": "Yellow",
                    "pricingType": "END USER",
                    "createdDate": "2024-10-04T15:26:03.000Z",
                    "createdBy": "Stephanie Corrales",
                    "lastmileSupplier": "BLUE OCEAN",
                    "catalog": "Default",
                    "resellerSupplier": "BLUE OCEAN",
                    "resellerProviderMrc": 30,
                    "resellerProviderNrc": 100,
                    "totalOrderValue": 1180,
                    "carrierZone": [],
                    "quoteCurrencyMrc": 35.29,
                    "quoteCurrencyNrc": 117.65,
                    "quoteCurrencyMrcCost": 30,
                    "quoteCurrencyMrcTotalPrice": 35.29,
                    "quoteCurrencyNrcCost": 100,
                    "quoteCurrencyNrcTotalPrice": 117.65,
                    "baseCurrency": "USD",
                    "quoteCurrency": "USD"
                }
            ],
            "externalApiProgress": 100,
            "transactionStatus": "Success",
            "message": "Solutions Found",
            "userFirstName": "Stephanie",
            "userLastName": "Corrales",
            "nativeUserId": "1419"
        }
    },
    "customerTransactionType": ""
}
Quote Sent
This event is triggered in Step 5 of the quoting process - "Send Quote". When a user completes the form, and clicks the "Send Quote" button, this event triggers the below payload.
{
    "status": "success",
    "customerTransactionType": "",
    "workflowEvent": "Quote sent",
    "data": {
        "accountId": 899777,
        "accountName": "Lordcalder Tests Limited",
        "dealId": 1068252,
        "dealName": "External Integrations",
        "quoteId": 1605404,
        "quoteName": "134 Flanders Rd Westborough MA 01581 USA#1605404",
        "createdDate": "2024-10-04T12:42:17.000Z",
        "createdBy": "Martin Calder",
        "configIds": [
            1446300,
            1446307
        ],
        "userFirstName": "Martin",
        "userLastName": "Calder",
        "nativeUserId": "15402"
    }
}