Customer Support Desk (CSD) Portal
We’ve updated the Connectbase Support Portal to make it faster and easier to get your request to the right team. This guide walks through what changed, what’s new, and how to submit a request going forward.
Note
Go-Live Date: June 1, 2026 — These changes will be live in the Support Portal starting Monday, June 1st.
What Changed and Why
The previous portal had separate categories for specific platforms and request types - things like Connections, Implementation, and General Help each lived as their own top-level options. Over time, as more platforms joined the Connectbase family, this structure became harder to navigate and made it difficult for customers to find the right form.
The updated portal replaces that structure with four clear, platform-agnostic categories. Rather than needing to know which platform-specific group to start in, you now start with what you need - and the form guides you from there.
Your existing open tickets are not affected. All in-flight requests will continue to be handled normally by your support team.
The New Portal at a Glance
When you visit support.connectbase.com, you’ll see four categories under “Contact us about”:
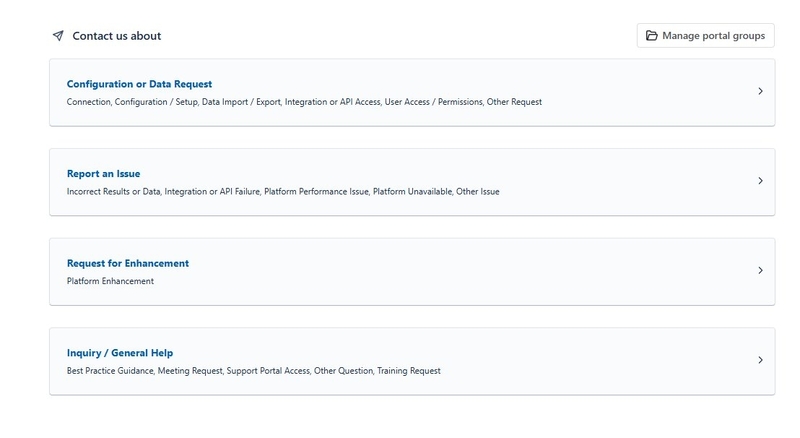 |
The updated portal home — four clean, platform-agnostic categories replace the previous structure.
Category | Use This When… |
|---|---|
Configuration or Data Request | You need something set up, changed, or enabled |
Report an Issue | Something isn’t working as expected |
Request for Enhancement | You’d like the platform to do something new or better |
Inquiry / General Help | You have a question or need guidance |
How to Submit a Request
Every request follows the same three steps:
Step 1 - Choose a Category
Select the category that best matches what you need. If you’re unsure, Inquiry / General Help is always a safe starting point - our team will help route your request appropriately.
Step 2 - Choose a Request Type
Each category breaks down into specific request types. Here’s what you’ll see under each:
Configuration or Data Request
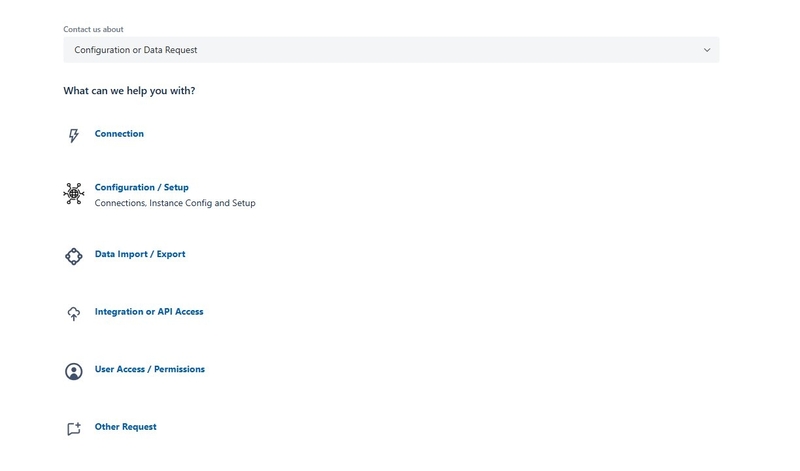 |
Configuration or Data Request - Connection, Configuration / Setup, Data Import / Export, Integration or API Access, User Access / Permissions, Other Request
Report an Issue
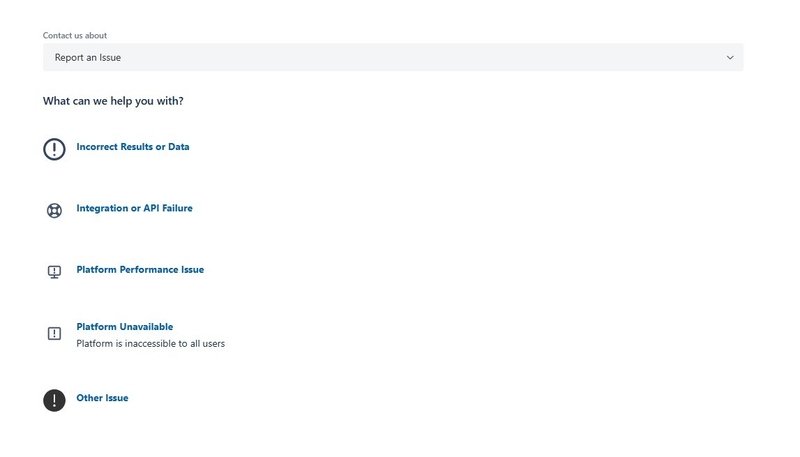 |
Report an Issue - Incorrect Results or Data, Integration or API Failure, Platform Performance Issue, Platform Unavailable, Other Issue
Request for Enhancement
 |
Request for Enhancement — Platform Enhancement
Inquiry / General Help
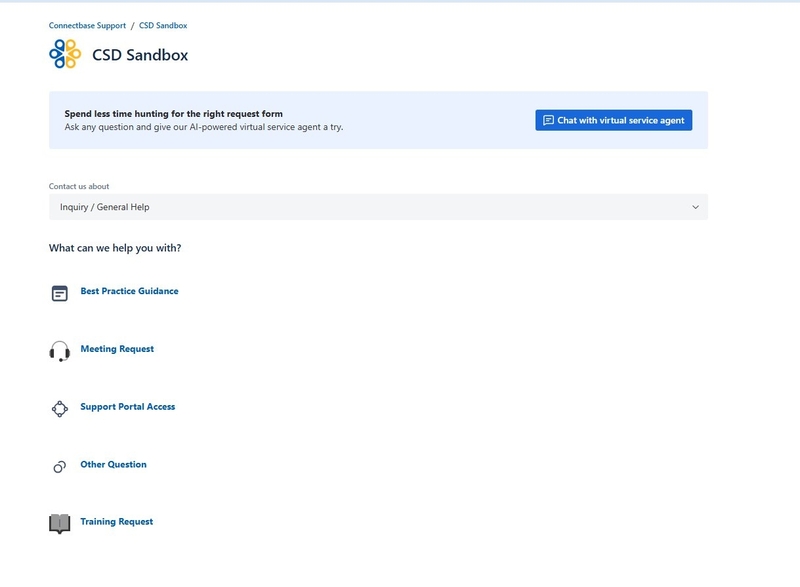 |
Inquiry / General Help — Best Practice Guidance, Meeting Request, Training Request, Support Portal Access, Other Question
Step 3 - Select Your Platform and Provide Details
After selecting a request type, you’ll be asked to choose your platform. This is a required step and drives the rest of the form - it determines which fields appear and ensures your request reaches the right team.
Platform options: TCW, Retail (Masterstream / MSD), CIM / NCS, CloudAge, LMX
️ Selecting the wrong platform may delay your request. If you’re unsure, use Inquiry / General Help and describe your situation - we’ll take it from there.
Where Did My Old Categories Go?
If you’ve submitted tickets before, here’s how the old structure maps to the new one:
Previously Submitted Under | Now Submit Under |
|---|---|
Connections | Configuration or Data Request → Connection |
Implementation | Configuration or Data Request → Configuration / Setup |
New or Update Requests | Configuration or Data Request |
General Help | Inquiry / General Help |
New Feature Request | Request for Enhancement → Platform Enhancement |
Report an Issue | Report an Issue (same category, simplified request types) |
Tips for Faster Resolution
Choose the closest matching request type. If nothing fits perfectly, Other Request or Other Issue work fine and we’ll clarify from there.
Select the correct platform. This is the single biggest factor in getting your request routed correctly and resolved quickly.
If you manage multiple groups, use the “Share With” field to associate the ticket with the right organization.
Provide examples - Quote IDs, screenshots, and specific examples help us triage faster.
For issues, describe both what is happening and what you expected to happen - this context is critical for our team.
Questions?
If you run into trouble submitting a request or aren’t sure where to start, submit a ticket under Inquiry / General Help → Other Question and we’ll sort it out for you.
If you require technical assistance or wish to report an issue to the Connectbase Support team, please log into the Connectbase Customer Support Desk Portal and submit a support ticket.
If you face issues in logging in to Connectbase Customer Support Desk Portal, email at portalsupport@connectbase.com or contact your CSM to report the issue. We will add your domain to provide access for your organization.
Submitting a Support Ticket
To submit a support ticket in the Connectbase Customer Support Desk (CSD) Portal:
Watch this short video on how to login and get started with Connectbase Customer Support Desk (CSD) Portal.
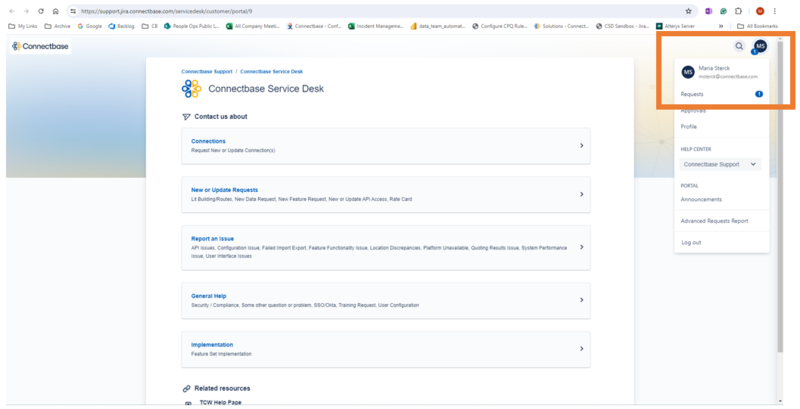
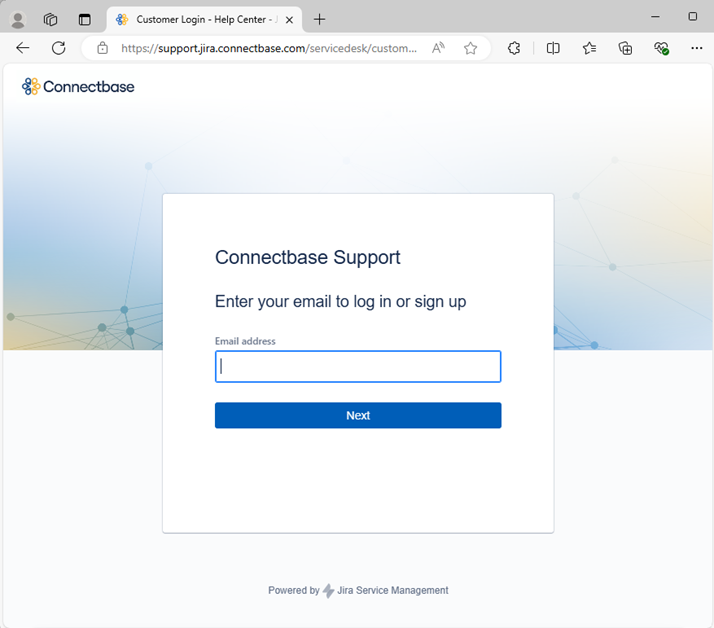
From you web browser, go to https://support.connectbase.com.
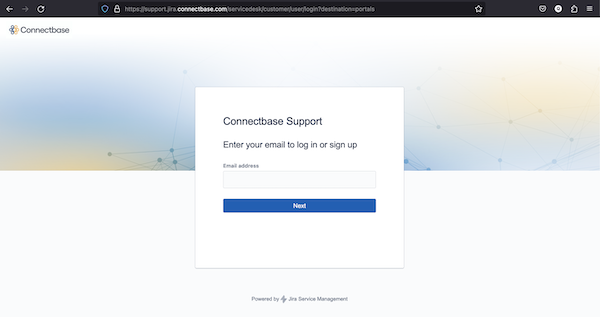
Enter your work email to signup or login to use CSD Portal.
If you are a new user, you are asked to sign up your CSD account. Follow the instructions given below to sign up your CSD account.
Enter your email address to register yourself with the CSD portal.
System generates an email for you to complete the sign up process.
Check your email and click on the link within the email.
Fill up the form and generate your password.
You are signed up to use Connectbase CSD portal.
Note
If you get an error stating "Your email is not approved for Access", send us an email at portalsupport@connectbase.com or contact your CSM to report the issue. We will add your domain to provide access for your organization.
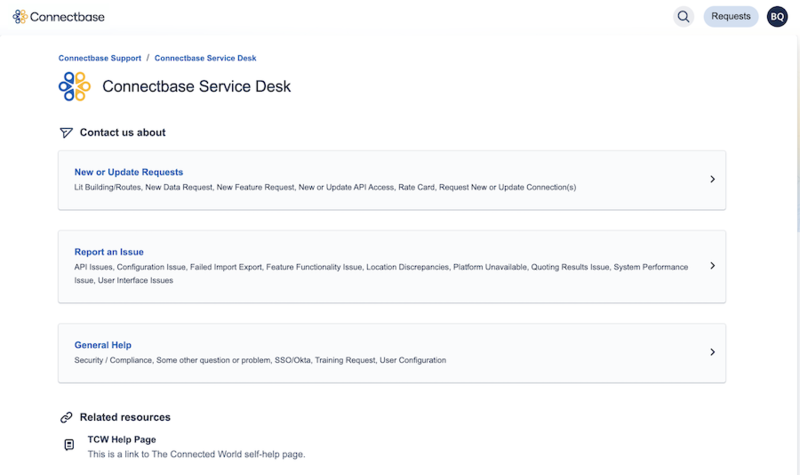
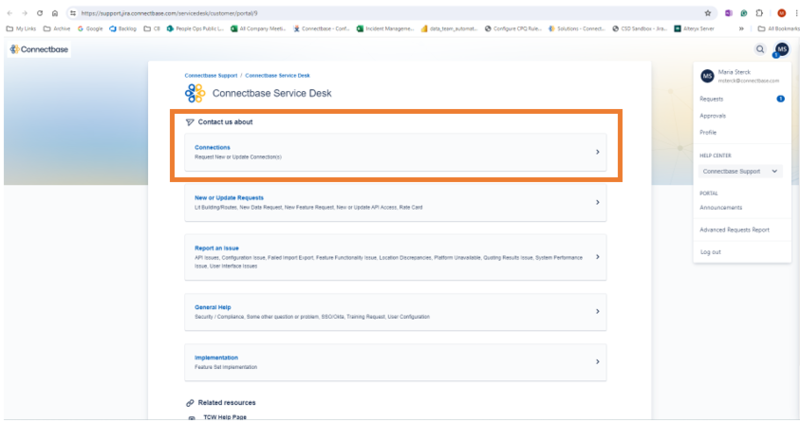
If you are an existing user, you are presented with the following screen to choose from an appropriate support category. Each category contains sub categories to select from, as shown in the below example.
Watch the video for creating a new request, report an issue or general inquiry.
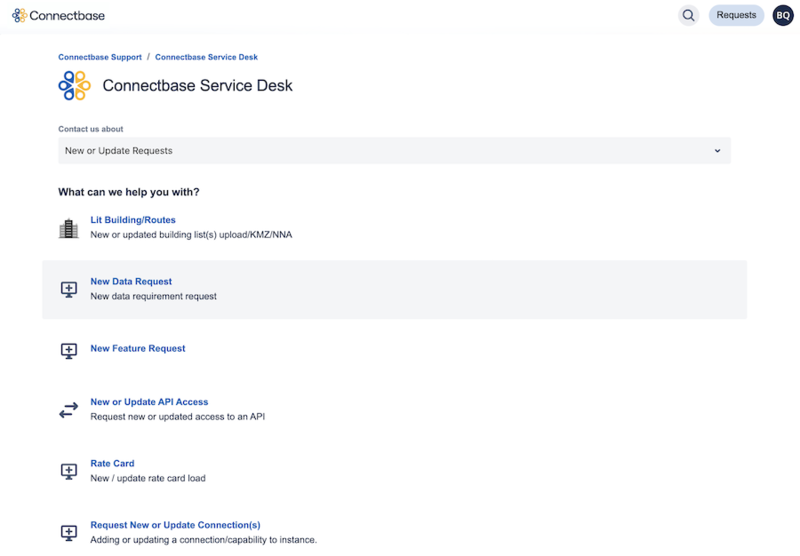
For example if you want to create a new request to upload building/routes, click on and click from Subcategories.
Result: Request subcategories screen displays as shown below.
This displays a request form as shown below:
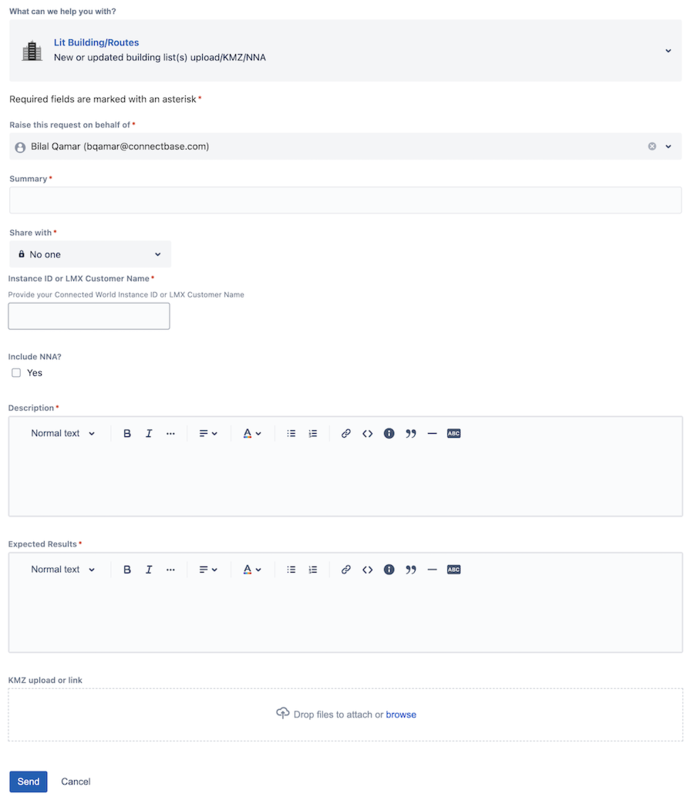
Fill the form. Please note that all fields marked with (*) are mandatory.
Click .
Result: A confirmation message pops up to confirm your ticket was submitted and an email is generated with ticket details.
Upon receipt of your ticket, the support team will review your ticket and assign it to the appropriate resource for resolution. The assigned resource will then communicate with you directly through the portal, which, in turn, will generate an email to you and any secondary contact persons to alert you to any incoming notifications.
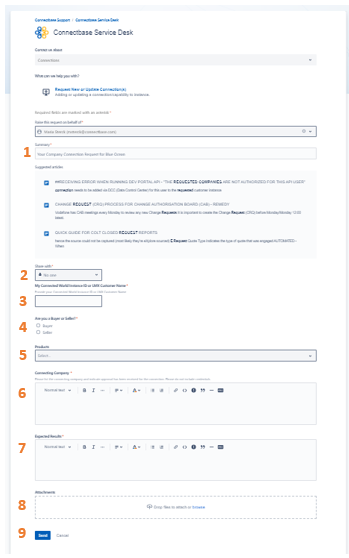
To raise a Connection Request submit a CSD ticket in Jira by following the below steps:
Access the Connectbase Customer Support Portal at https://support.connectbase.com and log in.
Once in the CSD Portal, select Connections
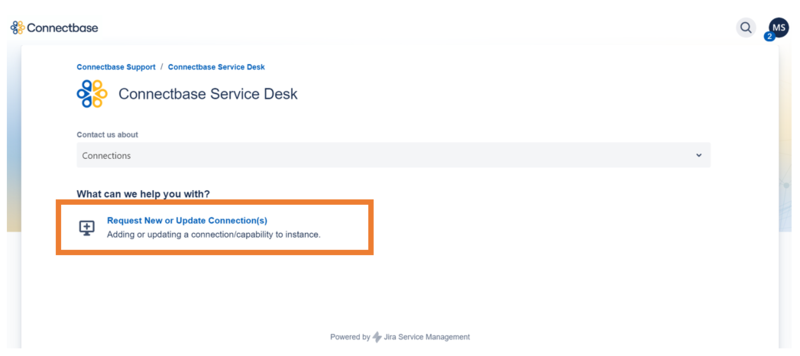
Select Request New or Updated Connection(s)
Complete the form as follows:
Summary: “Your Company Connection Request for Blue Ocean:
Share with: Select your Organization
My Connected World Instance #: Enter your instance number
Are you a Buyer or a Seller: Select whether you are a Seller or a Buyer
Products: Enter Product Categories you are interested in.
Connecting Company: Enter the Company you are looking to connect with (One company per ticket)
Expected Results: Establish a Connection
Attachments: Please attach the following:
Email Approval from Company you wish to connect with
Credential instructions (if applicable)
NOTE: If approval isn’t attached, your ticket will be set to “Customer Clarification” and will not be moved to “In Progress” until approval is received.
Submit: Once the form is complete click “Submit”.
A CSD ticket number will be displayed. Once approval is received your connection will be established within 48 hours.
To access and monitor progress on your Connection Request select your Profile Icon in the upper right-hand corner and select “Requests”.