Adding an account
From the Accounts page, you can use the Add Account function to search for an account or add a custom account.
Select from the navigation sidebar.
Click .
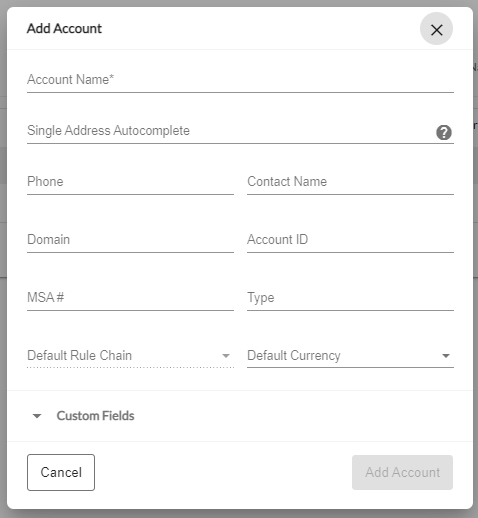
Result: The Add dialog box displays. From here you can search for an existing account or create a custom account.
Do one of the following:
To do this
Complete these steps
Search for an existing account to add
Click in the field.
In the Type to Search bar, type the name of the account.
As you begin to type the account name, an auto-populate list displays for selection. Once the account name is selected, the button is enabled.
Add a custom account
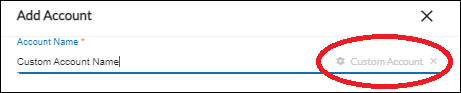
Click in the field, then press the keyboard Space bar. The Create Custom field displays at the top of the list.
Click and enter a name for the account.
The Add account dialog box displays and contains the same fields as the Search for Account, but also indicates that this is a Custom Account within the dialog box as shown below.
The remaining fields are optional, but where populated, are carried forward with the quote. These optional fields enable you to capture and store metadata that is important to your individual business structure.
If Custom Fields are configured for accounts within your instance, they display as options for selection from the dropdown list. You can select the custom fields you want added to the account and provide a value for each custom field selected.
Note
When entering an address, enter the complete and exact street address for your location; the 5-digit zip code is optional. For example, 1800 Amphitheatre Parkway, Mountain View, CA 94043, United States or 1800 Amphitheatre Parkway, Mountain View, CA. For international addresses, google search for the 3-letter ISO code for each country or countries in which you have included addresses. Validation will fail if the ISO code is incorrect.
Where applicable, you can select a preconfigured to be applied to this account.
Select the to be applied to this account.
Click .
Result: The newly added account displays in your account list.
Once the account is created, you can edit most field attributes from within the Account grid.
To edit an account attribute:
In the Account field to be edited, double click within the field.
For example, if you double click on the Default Currency, a drop-down list displays where you can select a different default currency to apply to the account.
Note that Account Name, User, and Created Date are not editable fields.
Add billing accounts to help you manage multiple local accounts and currencies (Quote currency) for the same end customer (Account). Once defined, your billing accounts can then be applied at the deal level. Deals under the same account can be associated with different Billing Accounts and have different quote currencies applied. See Adding a deal to an account for more details.
Billing accounts are optional. If the end customer (Account) does not have a Billing Account, the Account’s default currency is applied as the quote currency in the quote.
To add billing accounts:
Select from the navigation sidebar, use the Account filter to locate the name of the account in the account list.
To the left of the Account name, click the (dollar sign icon).
Result: The Add Billing Accounts dialog box displays.
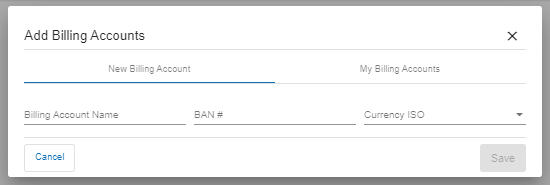
From the dialog box, you can add a new billing account, or you can switch to the My Billing Accounts and select an existing billing account to be applied.
For a new billing account, type a unique name to identify the billing account.
Enter the Billing Account Number in the field.
In the field, click the dropdown arrow to select the quote currency for the billing account.
Click .
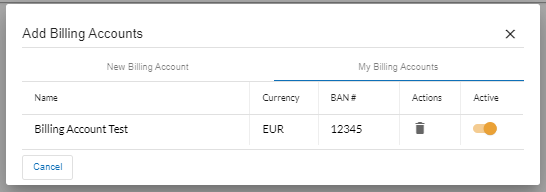
Result: The newly added Billing Account is now viewable from the My Billing Accounts toggle.
To activate/deactivate a billing account for use or omission from a quote:
Click the (dollar sign icon) next to an account.
Select the
Use the toggle to enable/disable the billing account configuration from being applied to a quote. When the Billing Account is added, this field defaults to Active/enabled.
To delete a billing account from an Account:
Note
There is no confirmation dialog for this action. Once you click Delete, the Billing Account is deleted.
Click the (dollar sign icon) next to an account.
Select the
Click the delete (trash) icon in the Actions column.
Result: The billing account is deleted.