Expanding the supplier record details
To expand supplier record details:
To the left of the field, click the  sign.
sign.
Result: The dialog box expands to show the following five tabs:
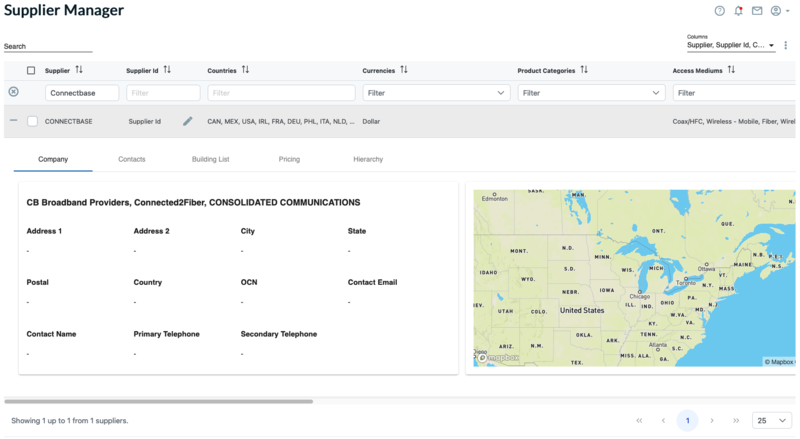
Company tab – Displays the name, address, and contact information for the supplier.
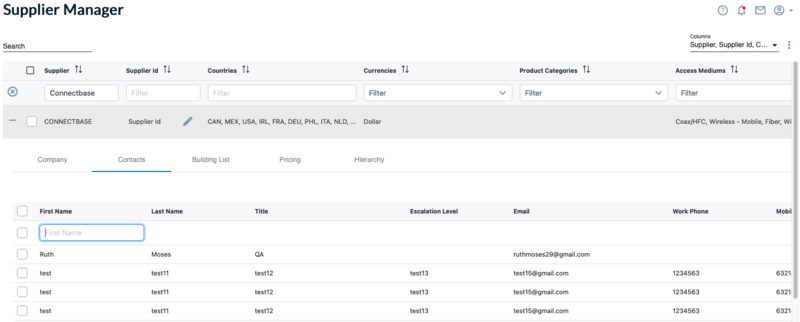
Contacts tab – Where applicable, provides the first name, last name, title, escalation level, email, and phone information for the key contact.
Building List tab – Displays the supplier’s building list.
Pricing tab – Where applicable, enables you to import/export the supplier’s price list.
Hierarchy tab - Where applicable, enables you to view, add and/or edit parent supplier
Note
Above tabs are only visible if the supplier is manually added in Network Radar and has shared their building/pricing lists using List Manager. If the provider is connected through internal API, only Hierarchy tab is available when expanding the supplier record.
When you expand the supplier record, the Company tab displays as the default view and enables you to see address information for the supplier.
 |
Click the Contacts tab to view a list of contacts that have been previously added for this supplier or to add additional contacts.
To add a contact:
Click the
sign to the far right of the Contacts page.Result: The record expands so that you can add and save the supplier contact information.
Complete the information fields as needed: .
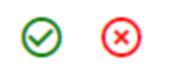
Click the (disk) icon.
Note
You can add CPQ contacts in Supplier Manager for Suppliers connected via Internal API or External API. Once contacts are added, you can use these to facilitate the Bid Management workflow.
The Building List page displays a compilation of the providers that have agreed to share their building lists with you. The Building Lists tab enables you to receive and view those provider’s building lists.
Viewing the Building List page
To view the Building Lists page:
Click from the navigation sidebar.
Click under .
Result: The Supplier Manager page displays.
Use the to locate the name of the supplier in the supplier list or use the in the Supplier Name field.
Click the
sign to the left of the Supplier field to expand the record.Click the tab.
Result: One or more building lists displays on the page
Click the
sign to the left of the building list to expand the record.Result: The Building List page displays. The following figure shows a populated Building List page.

Building List page properties
The Building List page provides the following filterable fields:
Field Name | Description |
|---|---|
Options | Provides the following options for obtaining/requesting more information
|
List Name | If this list was assigned a name during creation, the list name displays here.
|
Building Count | Identifies the number of buildings contained within the building list. |
Active |
|
Product Data | Indicates if Products and Services for pricing is turned on/off. If customer has only buildings loaded, this field is set to No. |
Last Received | Indicates the date that the last updated building list was received from the supplier. |
New Received | Indicates the date that a new building list was received from the supplier. |
Accept/Reject |
|
Published | Toggle field that you use to publish/unpublish supplier lists.
NotePublished lists are added to “”. If this field is set to No, the supplier data will not be included in CPQ quotes. |
Auto Publish | Enables you to specify one or more distribution lists for automatic updates, thereby eliminating the need for the user to re-accept every time there is an update. The AutoPublish toggle is blue when the feature is turned On/enabled or greyed out when the feature is Off/disabled. To enable a distribution list for automatic updates:
|
Competitor | On/Off toggle field that you use to identify if the company from which the list is received is a competitor. The selection controls whether the building provider shows as a Competitor, or as a Provider, within Building Intelligence. |
Source | Indicates if the supplier list is from an internal supplier building list or a supplier import file. |


To view a supplier building list:
Click from the navigation sidebar.
Click under .
Result: The Supplier Manager page displays.
Use the Search bar to locate the name of the supplier in the supplier list or use the Filter in the Supplier Name field.
In the Options column to the left of the supplier name, click the
 .
.Result: The supplier building list displays.
From the building list, click the
 locate building icon to the left of a building to locate the selected building on the map.
To request a supplier building list:
Click from the navigation sidebar.
Click under .
Result: The Supplier Manager page displays.
Use the to locate the name of the supplier in the supplier list.
To the left of the field, click the
sign.Click tab.
Result: Building Lists page displays.
In the Options column to the left of the supplier name, click the
 .
.Note
If the buildings were uploaded directly into Network Radar, the GET request does not display.
Result: An email notification is sent to the supplier requesting an updated building list.
Import and export functions can be applied to individual lists. In cases where you are re-importing an existing list, you can apply a setting to check the list for duplicates and only import net new records. Additionally, the export function lets you update and delete records at the individual supplier list level.
To import a supplier building list:
Click from the navigation sidebar.
Click under .
Result: The Supplier Manager page displays.
Click the (vertical ellipsis) located in the upper right corner of the page and select .
Click the button to download a sample import file and verify that your import file is properly formatted.
Fill the downloaded file and save it on your system.
From the dialogue box, click the button to locate and select the file you wish to import.
Click the button.
Result: An upload progress message displays in the lower right portion of the screen.
To delete a supplier building list:
Click from the navigation sidebar.
Click under .
Result: The Supplier Manager page displays.
Use the to locate the name of the supplier in the supplier list.
Click the box that appears to the left of the supplier name field to be deleted.
Result: A checkmark appears in the box to indicate selection.
Click the (vertical ellipsis) that appears in the upper right corner of the page and select .
When prompted, confirm that you want to delete the selected supplier from the list.
The Pricing Manager page enables you to receive and view OffNet Pricing from those provider’s that have agreed to share their Connected World product pricing catalog with you. If you have a rate card from a supplier, you can import the rate card. You can also send it from one customer’s instance to another.
To view the Pricing Manager page:
Click from the navigation sidebar.
Click under .
Result: The Supplier Manager page displays.
Use the to locate the name of the supplier in the supplier list.
To the left of the field, click the
sign.Click the tab.
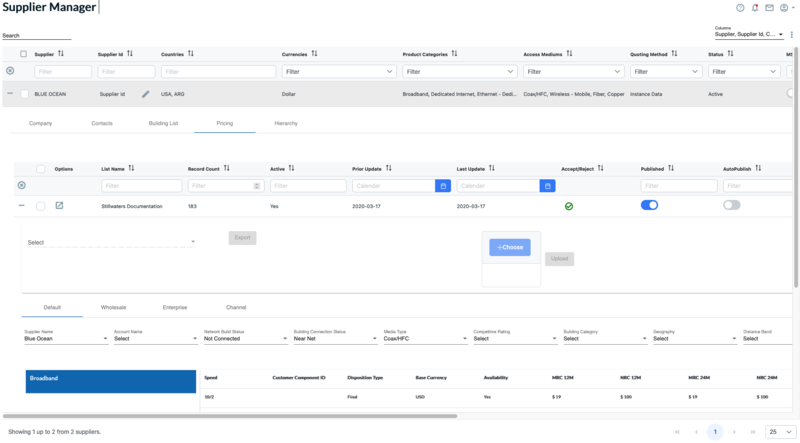
Result: The Pricing page displays.
The following is an example of Pricing page.

Pricing page properties
The Pricing Manager List page provides the following filterable fields:
Field Name | Description |
|---|---|
Options | Provides the following options for obtaining/requesting more information: Click the Click the |
List Name | If this list was assigned a name during creation, the list name displays here.
|
Record Count | Signifies the number of pricing line items that were sent over. |
Active |
|
Previous Update | Indicates the date that the previous updated pricing list was received from the supplier. |
Last Update | Indicates the date that a new pricing was received from the supplier. |
Accept/Reject |
|
Published | Toggle field that you use to publish/unpublish pricing lists.
|
Auto Publish | Enables you to specify one or more distribution lists for automatic updates, thereby eliminating the need for the user to re-accept every time there is an update. The AutoPublish toggle is blue when the feature is turned On/enabled or greyed out when the feature is Off/disabled. To enable a distribution list for automatic updates:
|
Contact Name | The name of the contact at the supplier site that manages the distribution of the pricing lists. |
To view a supplier’s pricing list:
From the page, click the
 icon in the Options field for the supplier pricing list you wish to view.
Result: The OffNet Pricing page displays, as shown in the following example. Note that the pricing is OnNet for the supplier who is providing the pricing, but OffNet for the receiver.
Import and export functions can be applied to individual lists. In cases where you are re-importing an existing list, you can apply a setting to check the list for duplicates and only import net new records. Additionally, the export function lets you update and delete records at the individual supplier list level.
To import a supplier pricing list:
From the page, scroll to the right of the tab, click the (vertical ellipsis) located in the upper right corner of the and select .
Optionally, but recommended, click the button to download a sample import file and verify that your import file is properly formatted.
Complete the following required fields:
Supplier Name
Contact Name
Contact Email
Provide a name for the list in the field.
Note
List Name field is optional for a direct import only.
Click the button to locate and select the file you wish to import.
Click the button.
Result: An upload progress message displays in the lower right portion of the screen.
To delete a supplier pricing list:
Click tab.
Click the box that appears to the left of the supplier name to be deleted.
Result: A checkmark appears in the box to indicate selection.
Click the (vertical ellipsis) located in the upper right corner of the frame and select .
When prompted, confirm that you want to delete the selected supplier from the list.
The tab within a Supplier enables you to see a listing of all the supplier inventory that is configured within your instance. It shows you all the APIs that Connectbase has set up and connected to your instance, including the companies, products, and how they are connected. An example of the hierarchy tab is shown below:
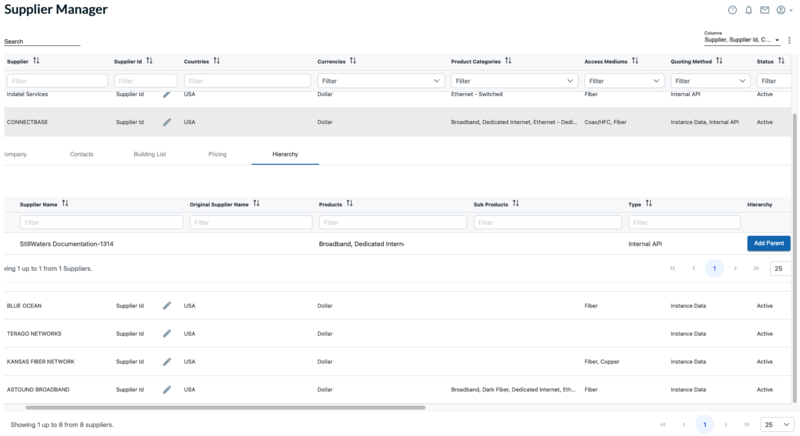 |
You can also assign the supplier a by clicking on the button in front of the supplier name under tab. To Add a Parent follow the procedure below:
Click on button in front of supplier name under tab.
Result: dialog box appears as shown below:
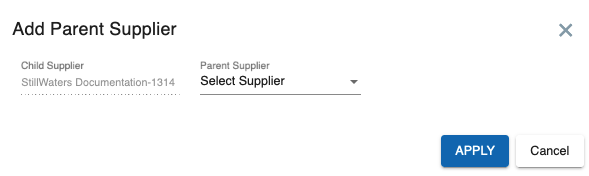
Click on drop-down arrow.
Result: Drop-down list shows the available supplier names that can be added as Parent Supplier.
Select a supplier name
Click button
Result: The selected supplier is assigned as a Parent supplier and button changes to button as shown in the below example.
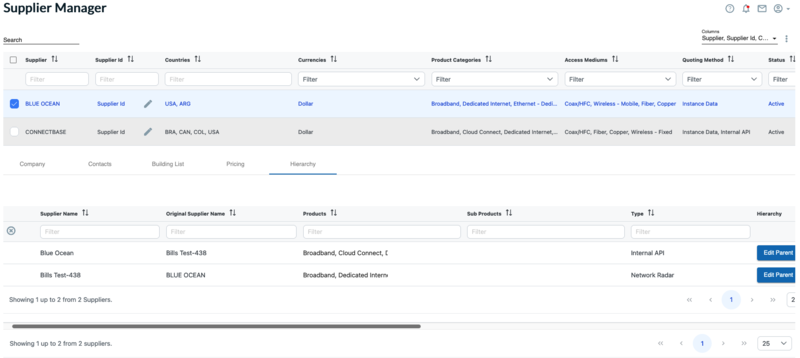
Note
One supplier can have one other supplier as a Parent only. When a suppliers is assigned a Parent Supplier, the button changes to Button. You can edit the parent supplier if the status of a supplier changes accordingly.
The Original Supplier Name is used to indicate a parent company name for the provider/supplier that will flow through to CPQ, APIs, and other areas of the platform.
Notice
As companies go through various mergers, acquisitions and name changes etc. this field helps you keep track of the current versus previous provider/supplier name and view both the parent and current provider/supplier name throughout the quote process. For example, the provider/ supplier TWC may be defined as Original Provider/Supplier Name = Charter (TWC).
To edit a original supplier in the hierarchy:
Under tab to the right of the Supplier Name field, click .
Result: The dialog box displays
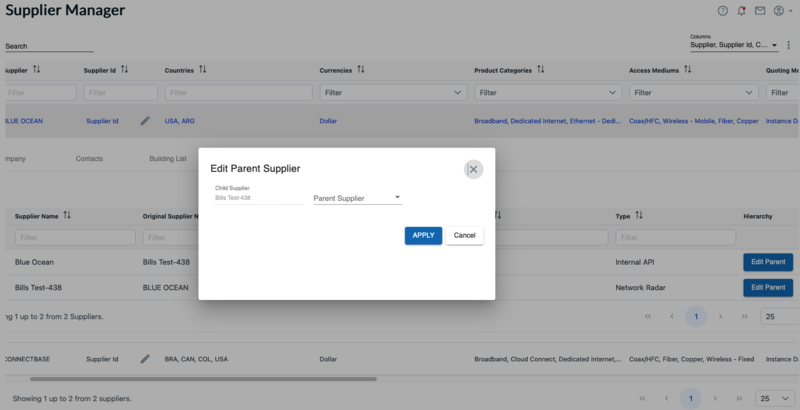
From the drop-down menu, select the name of the correct supplier.
Click .
Result: The Original Supplier Name now displays and is carried through the CPQ, APIs, and other relevant grids within the platform.